
Thursday, May 2, 2013
Paper Towels Below Table/Bunk
I got the idea when we pulled our camper from SC to Alaska. We were always getting up from the table for napkins because there was no convenient place nearby to keep them. I thought about hanging a roll of paper towels under an overhead cabinet but decided otherwise when I held the holder in position.
So I began moving the paper towel holder at various places to see if there was an acceptable place for it. In the process, the holder slipped out of my hand and ended up under the table...and that's where I mounted it. Out of the way, yet handy, and no problem when the table was in the 'bed' position.
 Walmart carries a stainless paper towel holder that pinches the roll hard enough to keep it from unrolling while underway or on the road.


Monday, April 22, 2013
Charging Batteries With A Combiner
Big Duck has two separate battery systems.
1) Typical start and house batteries with a 1-2-both-off switch. This includes a dual battery on board charger
2) A Freedom 30 inverter charger with dedicated group 31 battery. The Freedom battery charger is rated at 130 amps. We didn't buy the Freedom 30 for the boat, we removed it when we sold the camper.
I use a Yandina battery combiner to allow both start and house batteries to be charged by the engine alternator without having to mess with the main battery switch.
Yandina Battery Combiner
The group 31 battery is used with the inverter to power the fridge, that's it's only job. The fridge is 120vac only, a dorm model - significantly cheaper than a marine 120vac/12vdc refrigerators and we already had the inverter. The inverter/charger charges the group 31 battery when on shore power or when the Honda generator is running. Up until now, this hasn't been an issue because we run the Honda almost the whole time we're on the boat to power the air conditioner. The group 31 battery holds up fine for the little charging it needs in the summer.
In Spring weather however, we're finding the temperatures quite pleasant without running the air conditioner. This means that the group 31 battery will only keep the fridge going for a few days without running the generator, even though the boat is typically on the move for most of the day.
The solution is another combiner between the starting battery and the group 31 battery. Now the alternator on the engine will charge all 3 batteries when we're on the move, yet they'll all be isolated when charging voltage is not present. And what's more, the Freedom charger will also charge all 3 batteries on shore power or when the Honda is running. We will discontinue using the on board charger altogether.
Let's hope the engine alternator can keep up.
1) Typical start and house batteries with a 1-2-both-off switch. This includes a dual battery on board charger
2) A Freedom 30 inverter charger with dedicated group 31 battery. The Freedom battery charger is rated at 130 amps. We didn't buy the Freedom 30 for the boat, we removed it when we sold the camper.
I use a Yandina battery combiner to allow both start and house batteries to be charged by the engine alternator without having to mess with the main battery switch.
Yandina Battery Combiner
The group 31 battery is used with the inverter to power the fridge, that's it's only job. The fridge is 120vac only, a dorm model - significantly cheaper than a marine 120vac/12vdc refrigerators and we already had the inverter. The inverter/charger charges the group 31 battery when on shore power or when the Honda generator is running. Up until now, this hasn't been an issue because we run the Honda almost the whole time we're on the boat to power the air conditioner. The group 31 battery holds up fine for the little charging it needs in the summer.
In Spring weather however, we're finding the temperatures quite pleasant without running the air conditioner. This means that the group 31 battery will only keep the fridge going for a few days without running the generator, even though the boat is typically on the move for most of the day.
The solution is another combiner between the starting battery and the group 31 battery. Now the alternator on the engine will charge all 3 batteries when we're on the move, yet they'll all be isolated when charging voltage is not present. And what's more, the Freedom charger will also charge all 3 batteries on shore power or when the Honda is running. We will discontinue using the on board charger altogether.
Let's hope the engine alternator can keep up.
Friday, April 19, 2013
First 2013 Big Duck Outing
Well, it really wasn't the first Big Duck outing for 2013. Several weeks back, when my wife's sister Barbie came for a visit with her daughter Emily, we took Big Duck to Charleston. We like to take them to the coast for a couple days when they visit from Chicago but found that an ocean front motel was $600 for two nights and the others weren't that much cheaper. So we had booked a spot at the James Island Campground for a couple nights at $41/night.
James Island
It's the nicest campground we've ever stayed at; it even has a Dog Park complete with doggie swim area. Big Duck didn't get her feet wet that trip, but it was her first outing.
The first water outing started Wednesday 4/17 when Suzy, Merlin and I drove up to Lake Keowee for a couple nights aboard. This was our second visit to Keowee, so we were familiar with the drive up and knew of a great ramp.
First Keowee Cruise
I had been to the dentist the day before and had been drilled and fitted for a crown, so the trip was contingent on how I felt the next morning. The crown work was done by a lady dentist and turned out way better than anticipated, so we hooked up Big Duck and were off to the lake by noon even tho there were showers forecast for Wednesday and Friday.
When we arrived at the Crow Creek ramp there were 3 trailers in the large lot. Crow Creek is only one of the many great ramps on the Duke Energy lake so it's not unusual to 'put in' without any wait, and we did.

The slight rain that we had experienced on the drive up had stopped - we had a nice evening cruise, picking out a spot to come back to for our night on the hook. A protected place where Merlin could go ashore on a beach.
After we were anchored and Merlin had shore duty, the rain returned as a gently sprinkle.

We quickly put up the aft bimini. The rain was light with no wind so it came straight down. We stayed in our chairs on the aft deck to enjoy the symphony of drops on the canvas.
All day Thursday we plied the upper lake, taking in the sun, lavish homes and a waterfall...we had the glassy lake all to ourselves.


We found some of the other Duke ramps and a very nice campground complete with boat slips. Merlin got to go ashore on several occasions where we beached The Duck. The Friday forecast was for more rain so we anchored near the ramp that night, figuring we would get Big Duck on her trailer in the early morning before the weather set in. In the meantime, Merlin decided he needed to go ashore, so we tied up to the ramp and turned him loose. As we were getting ready to go back out and drop the hook, we learned that winds could be 30 mph on Friday, so at about 9pm, I decided to see about getting Big Duck back on the trailer in the dark.
This was one of the reasons we like the Crow Creek ramp; it's very friendly with a floating dock, however, as Merlin and I were ready to bring the trailer down to the dock, a boat pulled up on the other side. We'd wait for him. Then another boat came in. We'd wait for him too. Then another boat came in and we continued to wait, knowing it would take me quite a while to get the trailer down the ramp from the keyhole turnaroud.

Then this last guy decides after he gets loaded, he wants to spend 20 minutes in the keyhole adjusting things. By now it's raining again. Finally, about an hour later it's my turn and I have a helluva time getting the trailer lined up in the dark, but after directing Big Duck's spotlight on the ramp, finally got her loaded...well mostly loaded.
As the boat/trailer is being brought up the ramp, the stern settles down and the bow pulls away from the bow stop. I've had this problem since day one and have dealt with it is different ways:
Make a double purchase pulley for the strap
Lock 'em up at 5 mph to have her slide into the stop
Put 'slippery' on the bunks so she'll crank up easier
Turn around and head DOWN the ramp, then crank the winch
Back her back down the ramp into the water and recrank at intervals bringing her back out
I tried heading down the ramp and locking them up, then cranking the winch - but no joy, so I decided to deal with it after we'd spent the night aboard at in the lot...maybe back her into the lake again and do the interval thing.
We kinda slept in, in the lot until about 9am. I then tended to the things that needed to be done before hitting the road - locking up the sterndrive with the cable, stowing all the lines, remove the garboard plug, put the TPMS modules back on the trailer tires, move essentials into the van, make coffee... We got Suzy off the boat and into the van during a lull of the rain. I then decided if the boat wouldn't be encouraged to go forward, downhill, with full braking last night, then she wouldn't be inclined to move during the road trip home - so home bound we were.
There were some downpours on the way home, but for the most part the trip was uneventful. And who is to say where the boat should end up being on the trailer if it's happy?
However, once home, the wet grass prevented me from getting Big Duck fully home. No problems - close enough for now - gimmie a beer, even if it's 11am.
James Island
It's the nicest campground we've ever stayed at; it even has a Dog Park complete with doggie swim area. Big Duck didn't get her feet wet that trip, but it was her first outing.
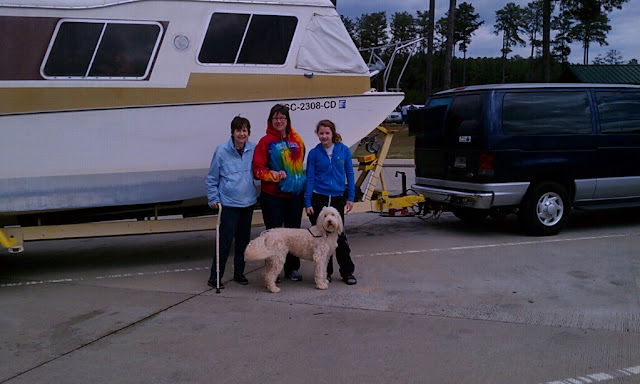 |
| Suzy, Barbie, Emily and Merlin on the way to James Island |
 |
| Our campsite at James Island |
 |
| Barbie, Emily and Merlin at the Dog Park @ James Island |
First Keowee Cruise
I had been to the dentist the day before and had been drilled and fitted for a crown, so the trip was contingent on how I felt the next morning. The crown work was done by a lady dentist and turned out way better than anticipated, so we hooked up Big Duck and were off to the lake by noon even tho there were showers forecast for Wednesday and Friday.
When we arrived at the Crow Creek ramp there were 3 trailers in the large lot. Crow Creek is only one of the many great ramps on the Duke Energy lake so it's not unusual to 'put in' without any wait, and we did.
The slight rain that we had experienced on the drive up had stopped - we had a nice evening cruise, picking out a spot to come back to for our night on the hook. A protected place where Merlin could go ashore on a beach.
After we were anchored and Merlin had shore duty, the rain returned as a gently sprinkle.
We quickly put up the aft bimini. The rain was light with no wind so it came straight down. We stayed in our chairs on the aft deck to enjoy the symphony of drops on the canvas.
All day Thursday we plied the upper lake, taking in the sun, lavish homes and a waterfall...we had the glassy lake all to ourselves.
 |
| Merlin liked the falls. |
 |
| All alone on the lake |
 |
| Calm waters |
 |
| Best first mate ever! |
We found some of the other Duke ramps and a very nice campground complete with boat slips. Merlin got to go ashore on several occasions where we beached The Duck. The Friday forecast was for more rain so we anchored near the ramp that night, figuring we would get Big Duck on her trailer in the early morning before the weather set in. In the meantime, Merlin decided he needed to go ashore, so we tied up to the ramp and turned him loose. As we were getting ready to go back out and drop the hook, we learned that winds could be 30 mph on Friday, so at about 9pm, I decided to see about getting Big Duck back on the trailer in the dark.
This was one of the reasons we like the Crow Creek ramp; it's very friendly with a floating dock, however, as Merlin and I were ready to bring the trailer down to the dock, a boat pulled up on the other side. We'd wait for him. Then another boat came in. We'd wait for him too. Then another boat came in and we continued to wait, knowing it would take me quite a while to get the trailer down the ramp from the keyhole turnaroud.
Then this last guy decides after he gets loaded, he wants to spend 20 minutes in the keyhole adjusting things. By now it's raining again. Finally, about an hour later it's my turn and I have a helluva time getting the trailer lined up in the dark, but after directing Big Duck's spotlight on the ramp, finally got her loaded...well mostly loaded.
As the boat/trailer is being brought up the ramp, the stern settles down and the bow pulls away from the bow stop. I've had this problem since day one and have dealt with it is different ways:
Make a double purchase pulley for the strap
Lock 'em up at 5 mph to have her slide into the stop
Put 'slippery' on the bunks so she'll crank up easier
Turn around and head DOWN the ramp, then crank the winch
Back her back down the ramp into the water and recrank at intervals bringing her back out
I tried heading down the ramp and locking them up, then cranking the winch - but no joy, so I decided to deal with it after we'd spent the night aboard at in the lot...maybe back her into the lake again and do the interval thing.
We kinda slept in, in the lot until about 9am. I then tended to the things that needed to be done before hitting the road - locking up the sterndrive with the cable, stowing all the lines, remove the garboard plug, put the TPMS modules back on the trailer tires, move essentials into the van, make coffee... We got Suzy off the boat and into the van during a lull of the rain. I then decided if the boat wouldn't be encouraged to go forward, downhill, with full braking last night, then she wouldn't be inclined to move during the road trip home - so home bound we were.
There were some downpours on the way home, but for the most part the trip was uneventful. And who is to say where the boat should end up being on the trailer if it's happy?
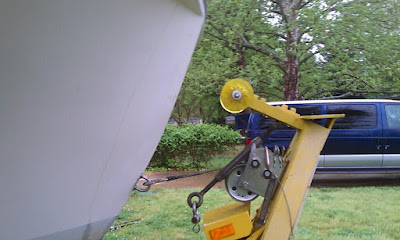 |
| So far away the turnbuckle won't reach. |
However, once home, the wet grass prevented me from getting Big Duck fully home. No problems - close enough for now - gimmie a beer, even if it's 11am.
 |
| Wet grass = no traction getting her back under the boatport |
Tuesday, March 19, 2013
Boat Trailer Guides
My boat trailer came with relatively short post guides. The top of these posts have the boat side of the posts relieved for the top foot or so. In this relief there is a roller installed in the pipe. This is a great idea as the roller is much easier on the boat than the pipe would be.

The problem is that I have a tri hull and the top of the pipe/roller do not go up to the sheer when the trailer is in the water, and unless the boat is perfectly centered the post ends up missing the outside of the hull and grinds against the "V" inbetween, not to mention the guides really weren't helping me get the boat on the trailer.

My original fix was to just put heavy PVC pipe over the metal post, long enough that it would be above the sheer when loading the boat on the trailer. That worked fine, the PVC stood up to good hits while trying to get the bow between the posts. And while I had solved the problem of scraping the hull, the guides still weren't helping me get the boat on the trailer.

To make this really work, I needed to get the posts farther apart, so I had a welder cut the posts off and put (square) sockets on the trailer. This would let me have an outward tilt to the poles and also I could adjust the posts outward in the sockets allowing more room to get the boat in. And it worked really well...except the posts had to be removed when I trailered the boat because they stuck out making the load over 9 feet wide. I was about to make "T" handles to attach the new posts in the sockets so I could easily remove the posts, but that would mean I'd still have to find a place to put them.

 Finally, the ultimate solution became apparent. I'd make a strap that connected the two posts at the top. It would be short enough that it would pull the PVC against the hull, thus narrowing the width and eliminating the need to stow the posts.
 Now we are wide off the trailer and narrow while on. The perfect solution so far.
The problem is that I have a tri hull and the top of the pipe/roller do not go up to the sheer when the trailer is in the water, and unless the boat is perfectly centered the post ends up missing the outside of the hull and grinds against the "V" inbetween, not to mention the guides really weren't helping me get the boat on the trailer.
My original fix was to just put heavy PVC pipe over the metal post, long enough that it would be above the sheer when loading the boat on the trailer. That worked fine, the PVC stood up to good hits while trying to get the bow between the posts. And while I had solved the problem of scraping the hull, the guides still weren't helping me get the boat on the trailer.
To make this really work, I needed to get the posts farther apart, so I had a welder cut the posts off and put (square) sockets on the trailer. This would let me have an outward tilt to the poles and also I could adjust the posts outward in the sockets allowing more room to get the boat in. And it worked really well...except the posts had to be removed when I trailered the boat because they stuck out making the load over 9 feet wide. I was about to make "T" handles to attach the new posts in the sockets so I could easily remove the posts, but that would mean I'd still have to find a place to put them.

Saturday, March 16, 2013
Checking Boat Trailer Brakes
After winter layup on the trailer, before I take Big Duck out for the first time I like to know the trailer is in good shape. This means a check of the, lights, bearings and brakes.
I check the lights by using a vehicle plug in the trailer connector. This way I can pull 12vdc off the trailer breakaway battery and use it to test turn, brake and running lights.
Testing the trailer lights
I don't disassemble the hubs every year, but I do like to check the bearings by jacking the wheel off the ground and spinning it. I expect a smooth and quiet spin, no scraping, no grinding and no hesitating or abrupt stopping.
I also check the brakes. Being totally electric, the trailer brakes are a snap to test while I have the wheel off the ground. I use the same plug setup as I do for the lights, but I have rigged a plug, wire and push button specifically for the brakes. The push button completes the circuit from the breakaway battery to the brakes and energizes the brakes with a full 12 volts. The wire is long enough that the button can be worked while giving the wheel a spin.
I check the lights by using a vehicle plug in the trailer connector. This way I can pull 12vdc off the trailer breakaway battery and use it to test turn, brake and running lights.
Testing the trailer lights
I don't disassemble the hubs every year, but I do like to check the bearings by jacking the wheel off the ground and spinning it. I expect a smooth and quiet spin, no scraping, no grinding and no hesitating or abrupt stopping.
I also check the brakes. Being totally electric, the trailer brakes are a snap to test while I have the wheel off the ground. I use the same plug setup as I do for the lights, but I have rigged a plug, wire and push button specifically for the brakes. The push button completes the circuit from the breakaway battery to the brakes and energizes the brakes with a full 12 volts. The wire is long enough that the button can be worked while giving the wheel a spin.
 |
| Vehicle coupling in trailer coupler with plugs and push button for trailer brake test. |
Tuesday, March 12, 2013
First House
Stumbled on the sale papers for our first house the other day; 1097 B Street, Ashland Oregon. The house was at the corner of Mountain and B Streets. This small lot was bordered on the other two sides by the county garage and the tracks. We think it was a converted ticket office for the train. We paid $7,000 for the house/lot. If we had financed the purchase it would have been $35/month.
The sheet says rewired 5 years ago. The wiring was two bare wires on insulators running the length of the attic. From these there were drops to 3 of the 5 rooms. During upgrading, we found exterior sides to the living room walls at he kitchen/bath and the bedrooms...the living room, 10 X 20 in the middle of the house, was probably the original structure. When we bought it, there was less than 700 sq ft. of living space. A single wall heater provided heat.
There were two bedrooms, each 10 X 10. No closets. The bath and kitchen were 10 X 13. The touted 20 X 12 workshop was merely a roof over gravel, which we enclosed and eventually made into a bedroom with a nice brick hearth and Franklin stove.
The trains ran right behind the house and we learned the different engineers by the way they blew the horn for the crossing. Early on, we noticed that on a regular basis, hippy types would gather at the crossing at regular intervals with food and blankets - the train would not stop, but would slow way down and the folks would jump aboard the open boxcars. We learned that this was a way to ride the train over the pass into California, presumably with the blessing of one of the engineers.
We remodeled all but the bedrooms including new ceilings, Then put up a two car garage between us and the train. It was about this time that we decided we wanted to get into sailing, put the house up for rent and headed east.
At the very time we decided to buy a brand new sailboat (Bristol 27), the renters decided to buy the house and we agreed on $14,000, just enough to pay for our factory new sailboat.


The last time we visited friends out that way, the house had been torn down (or fell down) and the corner was now part of the county garage.
PS - The house was a rectangle and if the bedrooms were 10 x 10 (and I think they were) the other rooms would have had to follow with 10 foot sides. Not sure how the sheet arrived at the 10 x 18 or 9 x 13 figures.
Sunday, March 10, 2013
Big Duck - Cushion Tops
Now that all her mechanical systems are in order, we'll begin to address limited cosmetics.
I thought I might tackle the sewing myself, but when my girls picked out a striped fabric to recover the tops of the cushions I went looking for a pro to do the work. We have 13 cushions and all of them needed to have the decayed Herculon tops removed and replaced. The rest of the cushion, sides and bottom are vinyl and in very good condition. A couple zippers needed work as well. I got a quote from a local Trim Shop for $30 for the small ones, then on up for the larger, and he didn't know when he could get to them. Ouch.
Got online and searched for other places near home that might do the work. Nothing.
In desperation I went to a sewing shop and asked if they knew anyone who was interested, thinking that someone there might want to take on the project. They weren't interested, but recommended a guy who works out of a garage in his back yard.
The backyard shop was anything but professional looking on the outside and the first view of the inside was equally disappointing. The shop was empty except for the single guy inside. The floor was a mess of fabric scraps and all the counters were cluttered with unfinished miscellaneous small projects. He said $15 for the small cushions and on up, and he would "work them in".
I was hesitant to take my $300 worth of fabric to him, wondering what his work looked like and if I'd ever see the finished product, but decided to take a chance. I took him four cushions.
When I dropped off the cushions the next morning there were 4 people working in the shop. One fellow was putting a vinyl top on one of those Rapper Mobiles with a fancy paint job and almost no rubber on the huge wheels. Another guy was putting a new rag top on a BMW. The other guys were working on pontoon upholstery. I felt a little better after seeing this kind of activity, but wondered if/when they'd get to my 4 cushions.
I got a call later that day, "They're ready."
I grabbed several more cushions and went to the shop, figuring I'd have a look at the work before I gave him another batch of cushions. Then left the next batch with him.
Got a call the next morning, "They're ready."
Loaded the remainder of the cushions in the van and went to pick up the ones that were ready. The vinyl top and new convertible top were done, waiting in the yard. They had put a black rag top on the BMW and used white stitching which was pure art. The stitches were exactly uniform, perfectly straight, no skips no wiggles...beautiful.
Well, it was Friday afternoon so I figured maybe Monday, as this was the largest batch of the largest cushions.
Got a call Saturday noon, "They're ready."
All told I spent less than $400 for all the work, including some zippers. I'll let you decide if it was worth it.


I thought I might tackle the sewing myself, but when my girls picked out a striped fabric to recover the tops of the cushions I went looking for a pro to do the work. We have 13 cushions and all of them needed to have the decayed Herculon tops removed and replaced. The rest of the cushion, sides and bottom are vinyl and in very good condition. A couple zippers needed work as well. I got a quote from a local Trim Shop for $30 for the small ones, then on up for the larger, and he didn't know when he could get to them. Ouch.
Got online and searched for other places near home that might do the work. Nothing.
In desperation I went to a sewing shop and asked if they knew anyone who was interested, thinking that someone there might want to take on the project. They weren't interested, but recommended a guy who works out of a garage in his back yard.
The backyard shop was anything but professional looking on the outside and the first view of the inside was equally disappointing. The shop was empty except for the single guy inside. The floor was a mess of fabric scraps and all the counters were cluttered with unfinished miscellaneous small projects. He said $15 for the small cushions and on up, and he would "work them in".
I was hesitant to take my $300 worth of fabric to him, wondering what his work looked like and if I'd ever see the finished product, but decided to take a chance. I took him four cushions.
When I dropped off the cushions the next morning there were 4 people working in the shop. One fellow was putting a vinyl top on one of those Rapper Mobiles with a fancy paint job and almost no rubber on the huge wheels. Another guy was putting a new rag top on a BMW. The other guys were working on pontoon upholstery. I felt a little better after seeing this kind of activity, but wondered if/when they'd get to my 4 cushions.
I got a call later that day, "They're ready."
I grabbed several more cushions and went to the shop, figuring I'd have a look at the work before I gave him another batch of cushions. Then left the next batch with him.
Got a call the next morning, "They're ready."
Loaded the remainder of the cushions in the van and went to pick up the ones that were ready. The vinyl top and new convertible top were done, waiting in the yard. They had put a black rag top on the BMW and used white stitching which was pure art. The stitches were exactly uniform, perfectly straight, no skips no wiggles...beautiful.
Well, it was Friday afternoon so I figured maybe Monday, as this was the largest batch of the largest cushions.
Got a call Saturday noon, "They're ready."
All told I spent less than $400 for all the work, including some zippers. I'll let you decide if it was worth it.


Subscribe to:
Posts (Atom)