Tuesday, May 31, 2011

Stanchion Base Leak Rebuild

I used the Multi Tool to open up the area, dug out all the rot, then used cabosil thickened epoxy to glue the rails in place to support the new decking.

Next I needed to make a pattern for something to fill the hole. I cut small pieces of light cardboard, lined the edges of the hole with them, then filled in the middle and taped the pieces together to make the pattern.


I was going to use 3/4 ply for the deck, but found that a 2X4 was just about the right width. Filling the hole isn't hard, once you have a piece of wood that looks like this. But making it look like this took a little bit of work.

Close enough with the rail positioned where it will eventually end up..

I epoxied the wood into the opening,
then made a fence around the area with Gorilla Tape (a very stiff sticky duct tape). I dusted the exposed sticky edges of the tape with microbaloons so when I laid in a couple layers of glass they didn't stick to the tape. After wetting out the glass, I added epoxy to almost the top of the 'fence'. The epoxy pretty much leveled itself before kicking.

The final step was to finish finish off with a layer of epoxy w/ micro ballons so it would be easy to sand the area smooth. Then, because I didn't have any primer, I just mounted the rail - we'll work on conmetics later.

Evidently, this area has really taken a beating over the years. Earlier I mentioned leaking leaking rainwater from the old rotted area, and laying some glass in the corner inside.Here's a pic of what I meant. If you follow the arc down from upper left to lower right in the pic below, starting about 1/2 way down, dark spider cracks become evident. Water that had leaked past the stantion was stained by the rotting wood. It ran down the inside and seeped out those spider cracks. Thus the necessity to reglass that corner from the inside.
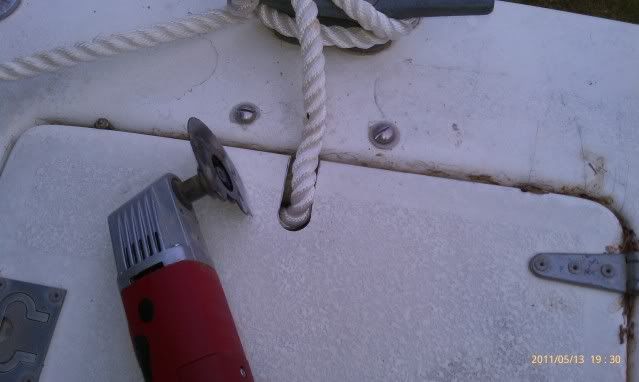
 While I was at it, I had to do something about the rope or wire that holds the steps in the proper place while in the down position. These aren't needed while the boat is on the trailer because the steps rest against a bunk while down. The two holes you see in the pic above are where an eye was screwed into the glass so a line could be attached. The line would run down and across thru the steps and back up to a similar eye on the other side. I wasn't a fan of the protruding eyes, so I decided to punch a hole thru the glass just a fuzz bigger than the size of the line and knot it on the other side. I gave the holes a downward taper to remove the hard edge.
And not knowing exactly how long the line should be for the correct down position, I only put a figure 8 stopper in the outboard line; the inside line will be long enough to go through the new hole, then run forward to a convenient place on the inside of the transom where I'll tie it to a cleat. That way I'll be able to easily undo the line and lay the steps against the bunk when the boat is on the trailer.

A swim is next for Big Duck - just need another body.

Sunday, May 29, 2011

Trailer - Tires & Brakes

I've done my share of pulling trailers and I've come to some conclusions. Many of my 50,000 miles of trailer pulling was done with a buddy boater, so we have his miles as experience as well.

Tires
If there's any way to put passenger or (light) truck tires on your trailer, you'll be better off than if you use ST (special trailer) tires. ST tires simply don't hold up well - maybe that's why they say, Not For Passenger Car Use, or For Trailer Service Only on their sidewall. Tread separations, weather checked rubber, and blowouts of spares that have never even seen the pavement are some practical problems, not to mention that according to the manufacturers, ST tires are only good for 6 years or 6,000 miles - whichever comes first. How would you feel about buying a car tire with the same life span? We don't baby our car tires either by jacking them up if they're not going to be used for a month, or putting covers on them.

If you don't use ST tires they'll come off the rim. Trailer tires need stiffer sidewalls. There's more UV protection in the rubber of ST tires. It's illegal to run car or truck tires on your trailer. All BS. I've run the entire Alaska Highway (both ways) with passenger tires on my boat trailer - and they were radials to boot; so much for rim or sidewall problems. If ST tires have more UV protection why do they weather check so quickly? And the DOT says if you do use non-ST tires on your trailer you must reduce their load carrying capacity by 10%.

I'm guessing the reason there is even an ST designation is because ST tires have standard load carrying capability, which means when you replace an ST tire with an ST tire you'll generally not diminish your ability to carry the load rating of your axle. Passenger and light truck tires of the same size can have different capacities. You could inadvertently replace a 14" ST tire with a 1360# capacity with a car tire with only 1100# if you didn't know the difference.

On some trailers, like mine which takes 8X14.5 tires for insance, both ST and LT tires are available. It's well worth the time/trouble to seek out the highway tires or you may end up like the previous owner of my trailer did, by putting 'new' tires on your trailer that have been in the store room for over 6 years and are no longer fit for service.

Chances are, you're reading this because you are unhappy with your ST tires. You're not alone. The forums are full of folks who are fed up with the performance of ST tires. Now Google to search for  problems caused by using car or truck tires on a trailer -- I couldn't find any either...just make sure you've got the load covered.

Now for brakes.
One of my boats came on a trailer without brakes. I told the shop I wouldn't take the (#5,500 gross) boat off the lot without trailer brakes, so at my expense, they put surge disc brakes on the trailer. Within 500 miles I had a bearing failure. The hub was replaced under warranty, but continued to run hotter than I liked, so I had a second axle put on the trailer. Actually, they put two new axles, with 4 new tires and a new actuator on while I waited. I was a happy camper.

After about another 500 miles I lost another bearing only 50 miles after I had checked the temps of the hubs with an IR gun. I was ready this time with a spare hub and was on the road again in about an hour. I experimented with ways to keep this from happening, like a stiff spring to keep the brakes from coming on so soon, and leaving more clearance in the castle nut/bearing to wobble the rotor so it would push the pads back into the caliper. I had good results with the heat problem, but only 3000 miles after a complete brake overhaul (new pads, turned rotors) on the way to Alaska, there was no pads left on one brake, with the backing plate constantly gouging the rotor. We searched, but no parts were available so I just locked out the brakes for the remaining 11,000 miles.


When I returned home, I contacted the brake people. They said 3,000 miles was about all I could expect from the pads and I should just get some new ones - at about $35 each. Trouble was the pistons were corroded in the calipers too so I opted to put a set of electric brakes on that axle and continue to run the surge brakes on the other axle. The entire replacement from hydraulic disc to electric drum was $150 for both wheels, and installation was 4 bolts, 2 wires and a castle nut for each wheel.

Not long after the I put on the electric brakes a hydraulic line ruptured on the disc brake side. I knew to try the bleeder screws on the calipers before I invested in any new parts - they broke off. So the second axle got electric brakes as well. Never had a problem after that - the electric brakes were still working fine when I sold the boat.


What else about electric brakes?
They work in reverse (you don't need a reverse lockout solonoid)
You can test them and apply them at will so you know they'll be there for you
There are no close tolerance hydraulics or bleeding for electric brakes
There are no moving parts in the coupler with electric brakes
New EVERYTHING is only about $150 per axle, with 4 bolts and 2 wires at each wheel
You can turn them off while going down steep grades
But you will need a controller in your vehicle (the brakes will not work without one) and a breakaway battery on the trailer.

Balancing Trailer Tires - Yes or No?
I guess it's not a bad idea, but before I discovered not to use ST tires on my trailers, the tires didn't last long enough for me to think of it as a good investment. Hmmm, if I could just do it myself.

I bought one of those 'bubble balancers', but never felt good about the procedure. And after getting slack from tire places about putting car tires on my boat trailer I bought a tire changer for less than $50 and bolted it to the garage floor to do my own tire swaps.


This really helped a buddy with failing torsion suspension because I could turn his tires around on the rim and get extra life out of them. Anyway with my own tire changer I thought I'd try some self balancing beads.

You put them inside the tire and they do a dynamic blance as you drive.


I put them in the front tires of my van too, so I could really tell if they worked, and they do work, about 90% of the time. Not sure why every now and then I'd get the wobble, and it always went away after not too long, but it made me wonder if/when it would reappear and so for the car/van I went back to regular balancing.

Once I went to car tires on the boat trailer I thought I'd just wait to see if any irregular wear appeared, and it did - after about 40,000 miles without rotating; so I no longer worry about balancing the trailer tires...who wants to spend extra buck to balance an ST tire that's only going to last 6,000 miles (or less)?

As much as I trailer, I'm pretty fussy about what's under my boat on the road, not to mention that I splash solo. It's been my experience that you can't beat a trailer that was designed for a specific boat. The boat fits the trailer, the trailer fits the boat, the boat is properly supported, the trailer is designed for the load, the tongue weight is correct and the boat sits low. For someone who only tows occasionally or for short distances, many of these things aren't that important.
Oh, and I'm a bunk trailer kind of guy. Too many moving parts with rollers and improper roller placement can deform the hull.

Friday, May 27, 2011

Tools and Supplies

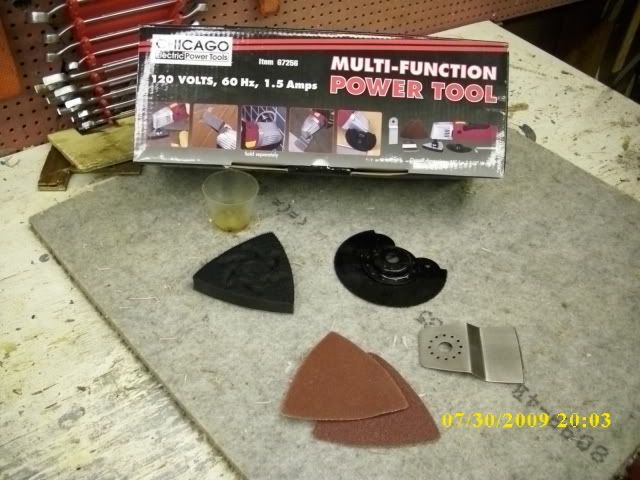
A couple things have made work to date on Big Duck easier and more fun. The first is a Multi Function Power Tool - I got mine at Harbor Freight for $40.


Great for precise cuts, like this slot into the line locker

Or to get into tight places to clean things up.

The second thing is Raka Epoxy.
Unlike some harder to measure epoxies this one is a simple 2:1. It comes in multiple viscosities and setting speeds. For $18 you can get a Sample Kit.  http://store.raka.com/epoxysamplekit.aspx which is great for any small project. They ship the day you order and for me that means I have it the next day.

There's another item in the epoxy pic, it's a pallet knife. Great for mixing and applying small batches of epoxy. Artists use them to mix oil paint. Nice thin flexible steel blade.

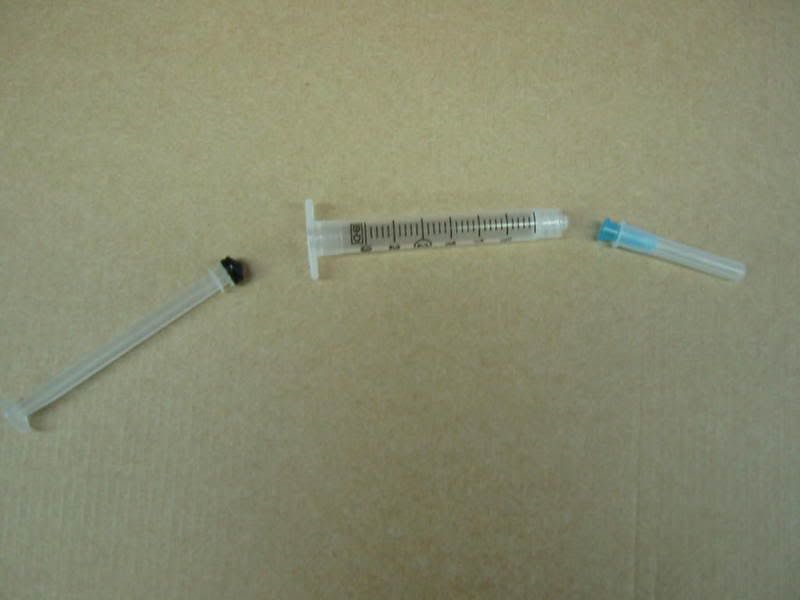
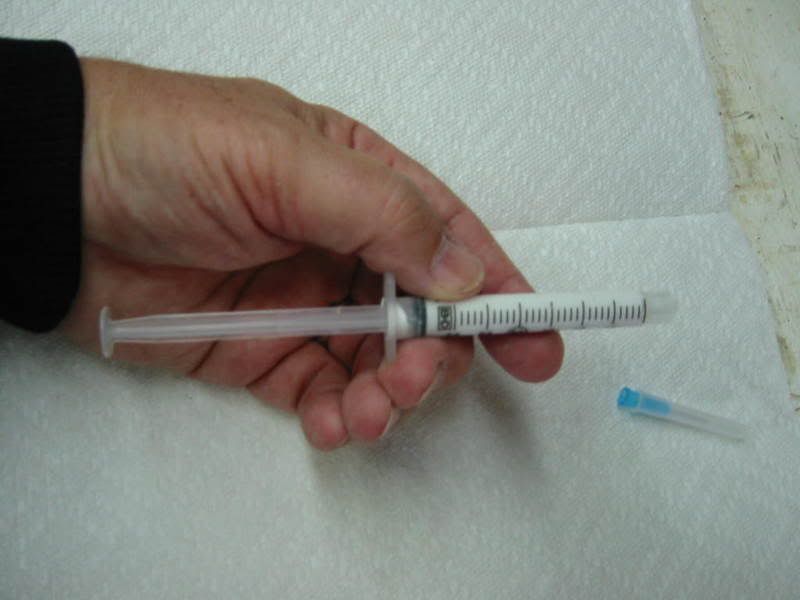
And while we're at it - a good way to tame 5200 is with a syringe.


I like to fill all holes with 5200 before I put the fastener in.
I use a' horse' needle from Tractor Supply for filling holes from the inside out.

Maybe tomorrow it'll quit raining and I can finish up that reconstruction?


Thursday, May 26, 2011

Introduction

Shortly after we moved ashore from three years of living aboard our 27’ sailboat,

my wife Suzy and I became fascinated with Sea Campers, an interesting concept – 24’ trailerable houseboat. We went so far as to put Want Ads in several Florida newspapers, following up with 4 or 5 trips from our home in SC to FL to look at prospects. None of the boats we looked at spoke to us. Somewhere along the way I got sidetracked and ended up buying the family a 35’ trawler.


The trawler earned her keep by being in charter service, but she was too much responsibility. My next boat was a selfish 15’11” cuddy as the family had seemingly lost interest in the trawler.

The three of us did occasionally go out on the 1511, often for several nights at a time, but when it became necessary to bring Suzy’s wheelchair along too because of her MS, we upgraded to an 18.5’ cuddy.

Between the two cuddies, we logged over 50,000 trailer miles, splashing at over 200 different ramps from New England to the Keys, to San Diego, and Alaska. But as we aged, the need to spend time under a real shower every few days made itself prominent and this was complicated by Suzy needing assistance to not only get ashore, but also in the facilities. If we were to continue boating, the facilities had to come with us.

Sea Campers again came into the picture and with the Internet we were able to scour the US for prospects – which we did. To be sure, there were many project Sea Campers to chose from, but nothing turned up that tickled my fancy.

While poking around on Classic Trailerable Houseboats I learned about Land N Sea boats, which were the big brother to Sea Camper, but they are 28’ and I didn’t want something that big, I’d hold out for a Sea Camper, but it had to have a flybridge.

A post on Classic Trailerable Houseboats curiously steered me to a ’72 Land N Sea on eBay. It was in the water and it did have a flybridge, and a new motor and a decent interior and the original trailer was ‘certified’ as road ready (although the trailer hadn’t been actually used in years). All things that encouraged me to bid, sight unseen.

The night the auction was to be over, I submitted my bid and went to bed. You can imagine my anxiety as I logged on the next morning to see who won the boat. Holy Ship! I had the winning bid! I Paypaled the deposit but had no idea how I was going to get the 2,100 miles to Lake Mead from my home in SC within 10 days to pick her up.

Rumors of my foolish bidding spread quickly and a couple days later a friend from where I had retired called to wish me luck. During the conversation he asked me when/how I was going to get her home. I told him I had no idea. He said, “Well Hey! I’m ready for a road trip.”


Two days out and three days back and Big Duck was in my back yard. It was a miracle of a trip considering the weather checked tires and untested trailer, but somehow everything went perfectly. Our boating adventures could now continue; we would have all the comforts of home with us. I would rename her One More Time Around!

Well, I didn’t rename her after all. She told me even though she would take us One More Time Around, she wanted to keep her name – Big Duck, so it shall be.


This Blog will be about the care and feeding of Big Duck.

Wednesday, May 25, 2011

Rear Stanchion Base Reconstruction

After digging into this leaking area, I discovered that it had been repaired at least 3 times before - none of which was a permanent fix.


There was some soft wood, but not as much as I thought.


After mulling over many fix scenarios, I decided to lay some epoxy/glass down the inside corner (which was leaking leaking rainwater) and brace the sides of the deck with oak, then lay in plywood and glass filler to get the deck back into shape to take the stanchion base.

Here you can see the oak rail being clamped/epoxied to the inside of the area.


When it cures, I'll add the rail to the outside, then trim up a piece of 3/4 ply to fit and epoxy/glass it in. When the rail is reinstalled, she'll be getting her feet wet.

Second rail setting up.

Tuesday, May 24, 2011

Bow Eye

While loading Big Duck after the purchase last September (2010), in trying to connect the cable to the bow eye, the bow eye turned 90° - apparently attached by a single bolt.

after putting a 4" inspection hatch in the line locker


It wasn't a problem to remove the old one,.


It's been on the list for a long time and the new bow eye has been in hand for months,


but now seemed like a good time, while I was mulling over the options for the stern stanchion area reconstruction.


Even with the winch removed and the breakaway battery out of the way, getting the second hole in for the new bow eye in will be a clearance challenge with the boat on the trailer.
Maybe one of those angle attachments for the drill? It's too hot to worry about it today anyway.

Got an angle attachment from Harbor Freight. It did the pilot hole, then quit working. Went back to HF and traded it in on a new one. The new one worked. It's a beautiful thing to have a new bow eye.