Wednesday, October 29, 2014

Big Duck Trolling Motor

I'm very new to trolling motors; never had a use for one until I considered putting one on my dinghy to get my dog ashore for potty. I bought the smallest one I could find and powered it with a lawn mower battery.

Trolling ashore for potty

This got old fast. Especially after the dinghy turned turtle with me in it while trying to get Merlin aboard for a trip to shore. On our next extended outing, to 1000 Islands we taught Merlin to go potty on a mat on the aft deck so the dinghy and trolling motor are no longer needed or even taken aboard.

A while back my son-in-law's dad bought an old pontoon boat which will be converted to a dock. He offered me some of the stuff that came with the boat - all he wanted was the deck and pontoons. One of the things in his pile for the dump was an old trolling motor with no remote -- which I assumed to be one of those foot control things. There were also open ended wire plugs and wires that needed to be attached to who know what?
What were all these plugs for?

There was no handle to steer it with either. And I already had a trolling motor that was of no use so I told him I really wasn't interested. I did take some of the other stuff though and when we had it all loaded up in the car he asked again if I didn't want the trolling motor. I said OK, I'll put it up on eBay for parts, so he put it in the trunk along with the charger.

When I got it home, I pulled the plastic off the motor to see where the open wires went. There were small wires with plugs and a couple power wires with corroded terminals. While I was renewing the wiring I came across a circuit board that appeared to have an antenna. This was getting interesting.

Further research showed that this was a high end motor that could either use a wired foot control or a wireless key fob. I poked around further and found a replacement fob for <$50. What the heck, I bought one.

By the time the fob showed up I had everything else pretty much in place and discovered to my amazement that this trolling motor was fully functional.

I still wasn't sure what I was going to do with this thing and it wasn't until I wired up Big Duck with some #6 cable to take a charge from the van's alternator while on the road Van Alternator to Charge Boat Batteries that I was inspired to use that connection for the trolling motor.

Connector at boat side that leads to Big Duck's house batteries.

This large trolling motor did not come with a transom clamp, it needed a permanent deck mount. I fastened the motor to a 2 x 10 and walked it around the bow to see if I could find a good place to put this honkus motor.  I decided until it proved itself I'd remove the anchor pulpit and mount the trolling motor to the hinges.
Hinged Anchor Pulpit

After I got the trolling motor fixed to the new wood base complete with hinges, I removed the anchor pulpit and put the hinge pins back in with the trolling motor in place. This looked like it would work for a test, but it was going to be quite a hassle removing and storing the trolling motor when I needed to use the anchor. I'd really like a permanent place for the trolling motor if even just for testing.

At this point it was a no brainer to mount a new hinge base right next to the anchor pulpit, so I did.
White anchor pulpit hinges and wood trolling motor hinges
It was fortunate that this new trolling motor had such a long shaft, otherwise this setup wouldn't get the prop in the water.
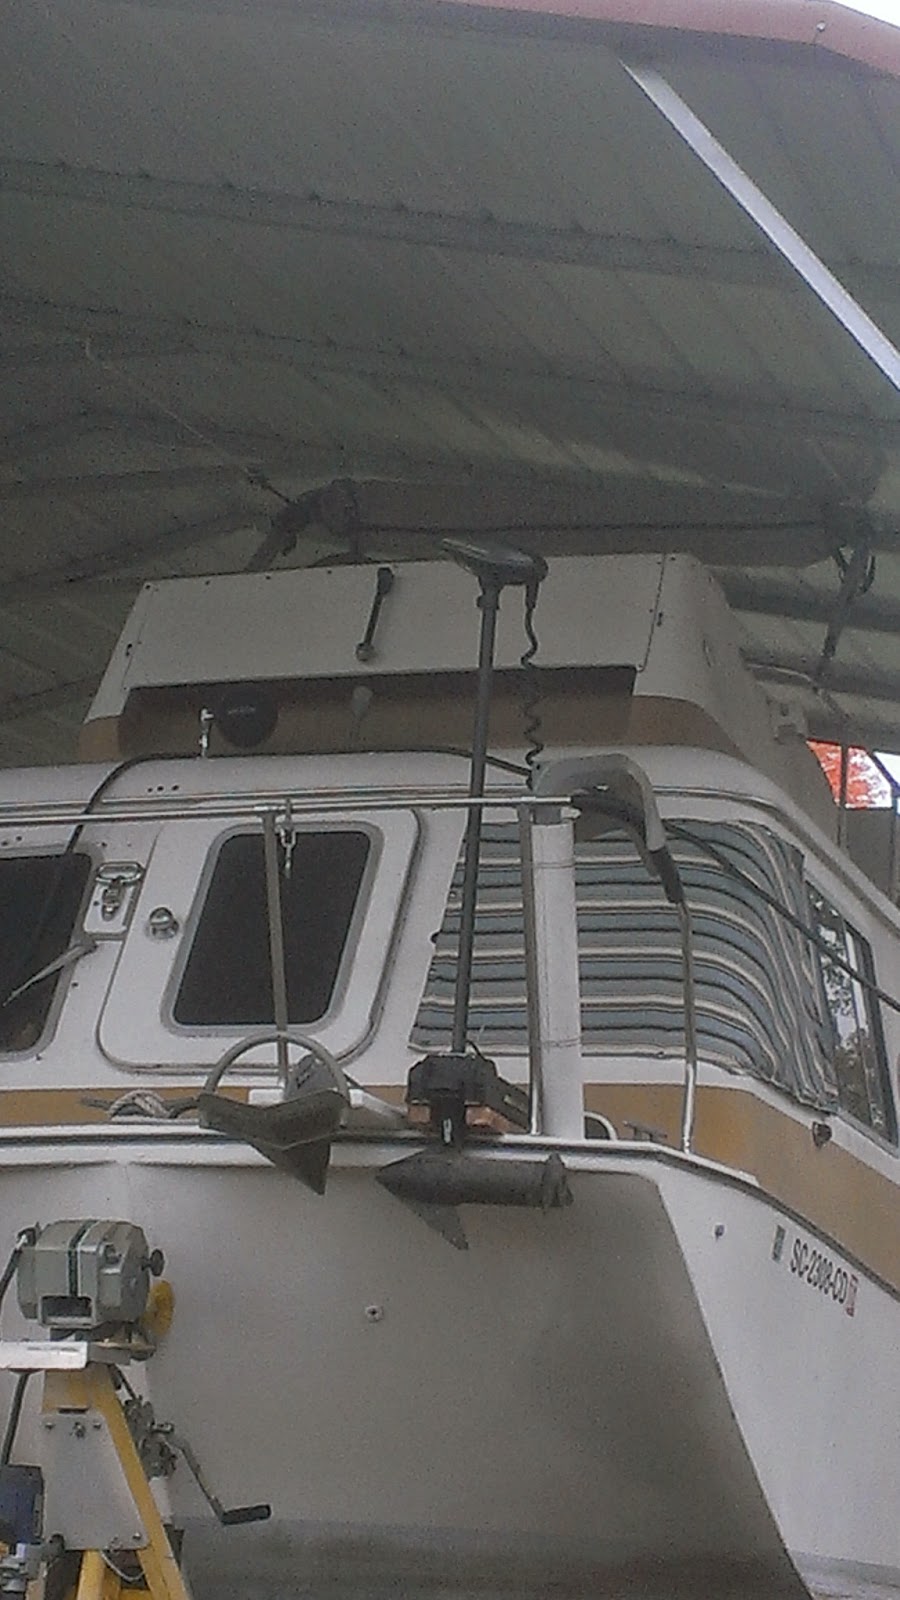
We think the trolling motor propeller will be deep enough?
It's hard to believe this rig will actually work?

With the wireless remote, it this thing works, I'll even be able to use it from the flybridge.

When the trolling motor is locked up, we're talking UGLY here in every sense of the word. But to me, Big Duck's real beauty is in her comfort and utility.


Van Power to Charge Boat Batteries

You may know that Big Duck sports a freezer on her aft deck. We use a 5 gallon brine brick to keep the temp in that freezer  28 - 34° for my beer and frozen food when the freezer is unplugged. Unplugged, the brine brick is good for at least 6 days even with much use.

The challenge is the refrigerator -- which I call Suzy's Lettuce Locker. When the original 12/120 unit bit the dust, I opted for a cheap dorm, all fridge (no ice maker) unit at 120 only.
Suzy's Lettuce Locker

We have a 3000 Watt inverter on board so getting 120 for the dorm fridge is no problem if the batteries are up.
Xantrex Freedom 30
On the water, we usually run the motor 2 - 3 hours a day and with the generator use at night for heat - a/c or just cooking, we have plenty of reserve for the 120 fridge. The challenge is on the road while we use Big Duck as a camper. Well, I guess if we stopped at campgrounds every night and hooked up to shore power we'd be OK, but we prefer to Wallydock = dry camping. So how do we keep the batteries up for the fridge without running the generator all night?

Most vehicle plugs have the ability to send charging current to the trailer break-away battery to keep it charged for emergency braking. My van manual says I should use a 30 amp fuse in the circuit to charge that break-away battery. I have wired that circuit to my house batteries so while on the road, my van alternator can charge my boat's inverter battery in addition to the break-away battery.
Van connector now feeds power to polarized connector
This is the boat connection that is wired to Big Duck's house batteries w/ #6 cable.
This doesn't complete the installation because now the polarized connector directly sees the full potential of the break-away battery...touching the hot pin to ground will be a direct short. I could just put in a switch but I know I'd forget to have it in the right position at the right time. Poking around in the electric parts locker I came up with a spare VSR (voltage sensing relay). I have these installed between all of Big Duck's batteries so if any battery is receiving a charge from any source, the relay closes and they all can receive a charge.

VSR or Battery Combiner

I wired the break-away battery to the VSR so he polarized pin is only hot then there is a charging voltage.

A test showed that a 10 amp battery charger will run fridge and keep the house batteries up but it will take some road miles to really prove the system.

Sunday, October 19, 2014

Engine Heat for Hot Water

Big Duck had a pair of open copper lines in the engine compartment when we got her. We figured these were at one time plumbed to the water heater water to use engine heat to make hot water, but because we had a 3000i generator which was wired to make hot water, I was not inspired to install hoses to make the water heater work with engine heat. I guess I was also a little leery about clogging up my engine access with hoses running hither and yon.
open copper lines in the engine compartment


Well, I finally decided to give this engine heat thing a try. I first pressurized the copper lines with hose water to test the integrity of the system. I connected one of the copper pipes directly to the hose -- the other copper pipe was connected to a hose shut off valve. I turned on the hose water a bit and let it run free to start, then using the shutoff valve I restricted the flow just enough to create a little pressure in the system...after a couple hours the bilge was still dry and I was satisfied that the system was in tact.

The instructions say to take the engine hot water feed from right under the thermostat. I had a temperature sensor right there, which I planned to "T" into to send engine heat to the water heater. The return from the water heater would go to the 9 o'clock plug on the circulation pump.

The open copper lines take a 5/8” hose nicely so that’s how I decided to set up the system. All I’d need was a 5/8 barb to ½ pipe for the circ pump return, a 1/2 pipe nipple and “T”, and a 5/8 barb to ½ pipe to get both the feed and temp sender plumbed just under the thermostat in the old temp sensor hole.

The return line to the circ pump was a no brainer, but when I tried to fit the “T” under the thermostat for the hot feed and temp sensor, there was not enough clearance to bolt down the thermostat housing. If I was going to go this route, I’d need to make a ½” spacer to fit between the intake manifold and the thermostat housing to get clearance for the “T”.

no clearance between the temperature probe and thermostat housing


I didn't have any ½” aluminum to make the spacer so I dialed up eBay to find some stock. On a whim I searched for thermostat spacer and I’ll be darned if some didn't turn up – and they were for the Chevy small block.

The spacer even came with a 3/8” pipe port for the 5/8” hose barb, and I ordered up the fitting. Now I could leave the temp sensor in it’s original home and take the hot feed from the spacer.
spacer with tapped hole for water heater water

temperature probe in place with room from spacer for hot engine water to water tank


Knowing I’d need to make provision for winterization of the hot water engine heat system, I incorporated brass hose fittings in both the to and from hoses so I could easily detach them from the copper pipes and then connect them together if I wanted to run the boat without sending water to the heater.


And, because I hate gouging myself on those bands that protrude from hose clamps, I used Clamptite clamps on the brass hose fittings. 

Clamptite clamps   http://www.clamptitetools.net/


And the hoses were tucked away so they wouldn't interfere with access to the motor.


Now we were cookin' with engine heat for hot water, easy winterization and the ability to not feed hot engine water water to the water heater if we were winterized and wanted to go out for the weekend.