Saturday, February 25, 2012

Update

I've decided on an aluminum tank from Atlantic Coastal Welding because they are responsive and helpful. The plastic tank folks don't seem like they really want to do business.

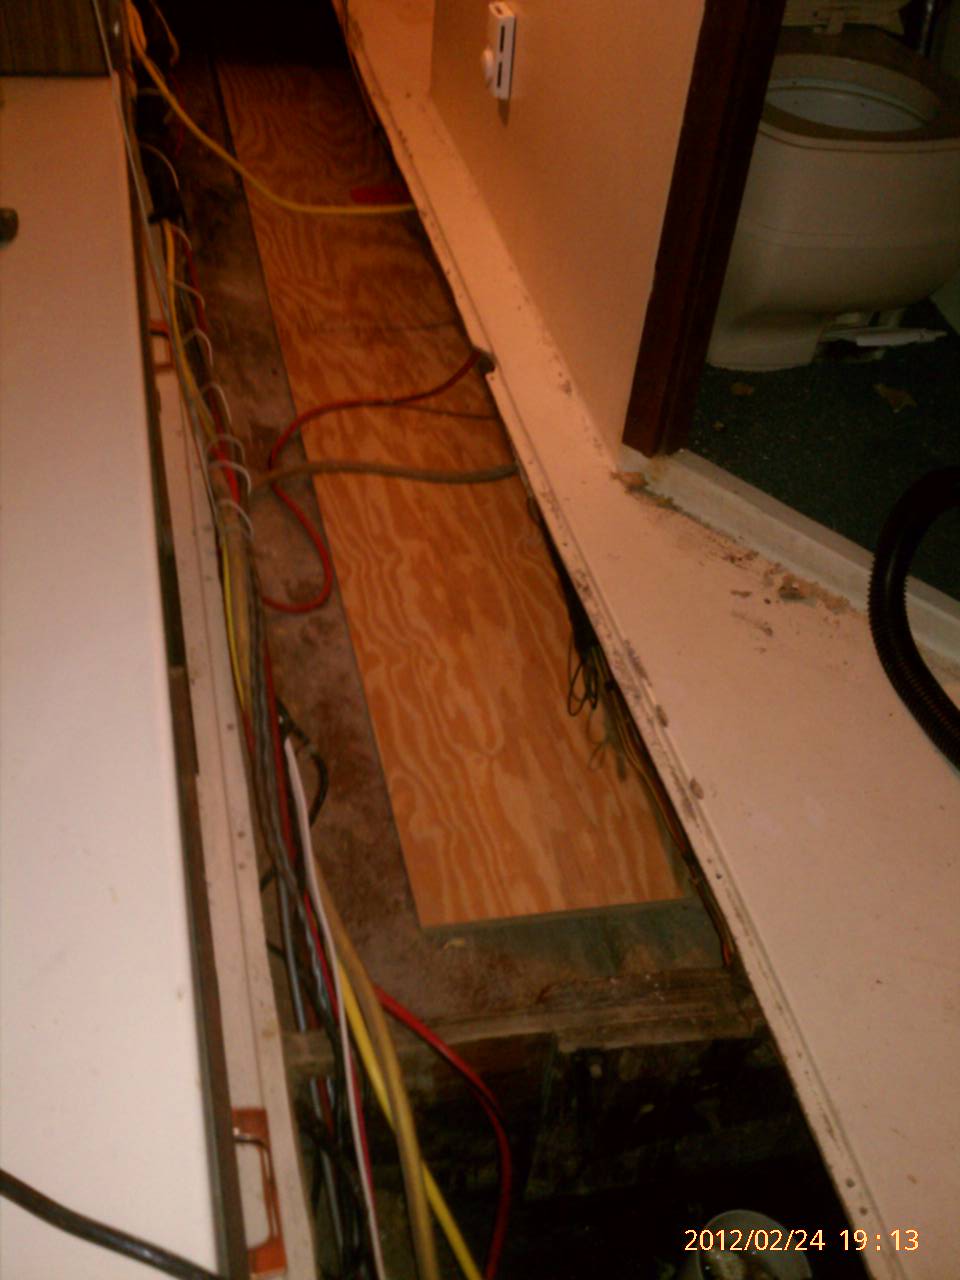
So, I've prepared the shelf/floor for the new tank. I will use fiberglass tape on the edges and coat the top and bottom of the plywood with at least one coat of epoxy, tab it into the bilge then paint it. Unlike the previous tanks, the new one will NOT be foamed in.
The new tank will be 10 feet long (as opposed to the previous two 5 footers) but I'm still trying to decide whether I want to make it a rectangle or shoehorn an odd shape in for a few extra gallons of capacity.

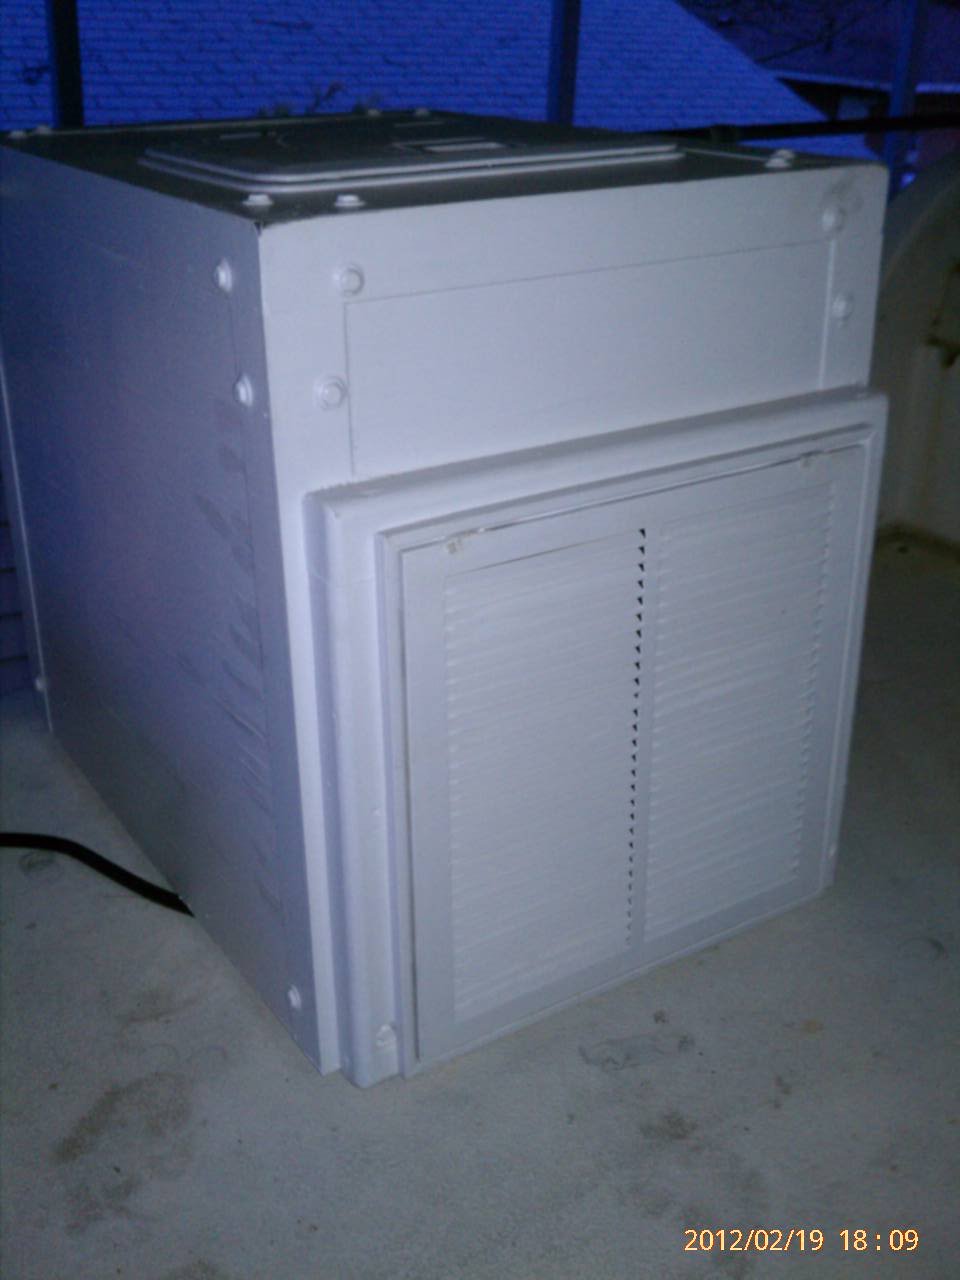
The old tanks (top) are notched to allow clearance for the fill hose going along the aft tank to the forward tank. The forward tank also needed the notch because the fill fitting requires 2 1/2" of space above the tank for the fill elbo and there's no clearance between the top of the tank and cabin sole. The aft tank fills from the upper part of the tank because it slides about 6" under the bulkhead into the engine room and there's clearance there for the fill fittings. The forward tank is identical except for the placement of the fittings, but is shifted a couple inches to starboard to clear the sink/shower drain pipe going aft to the holding tank.
The original cutaway corner version of the new tank (lower template) fit correctly where the aft tank was, but wouldn't clear the drain plumbing (where the original forward tank had been moved). A rectangle tank would need to be 16.5" wide and 10" tall, whereas an redesigned cutaway corner tank is 18.5" wide and 10" tall...maybe a 15 gallon difference between the two? More to come on the new tank.

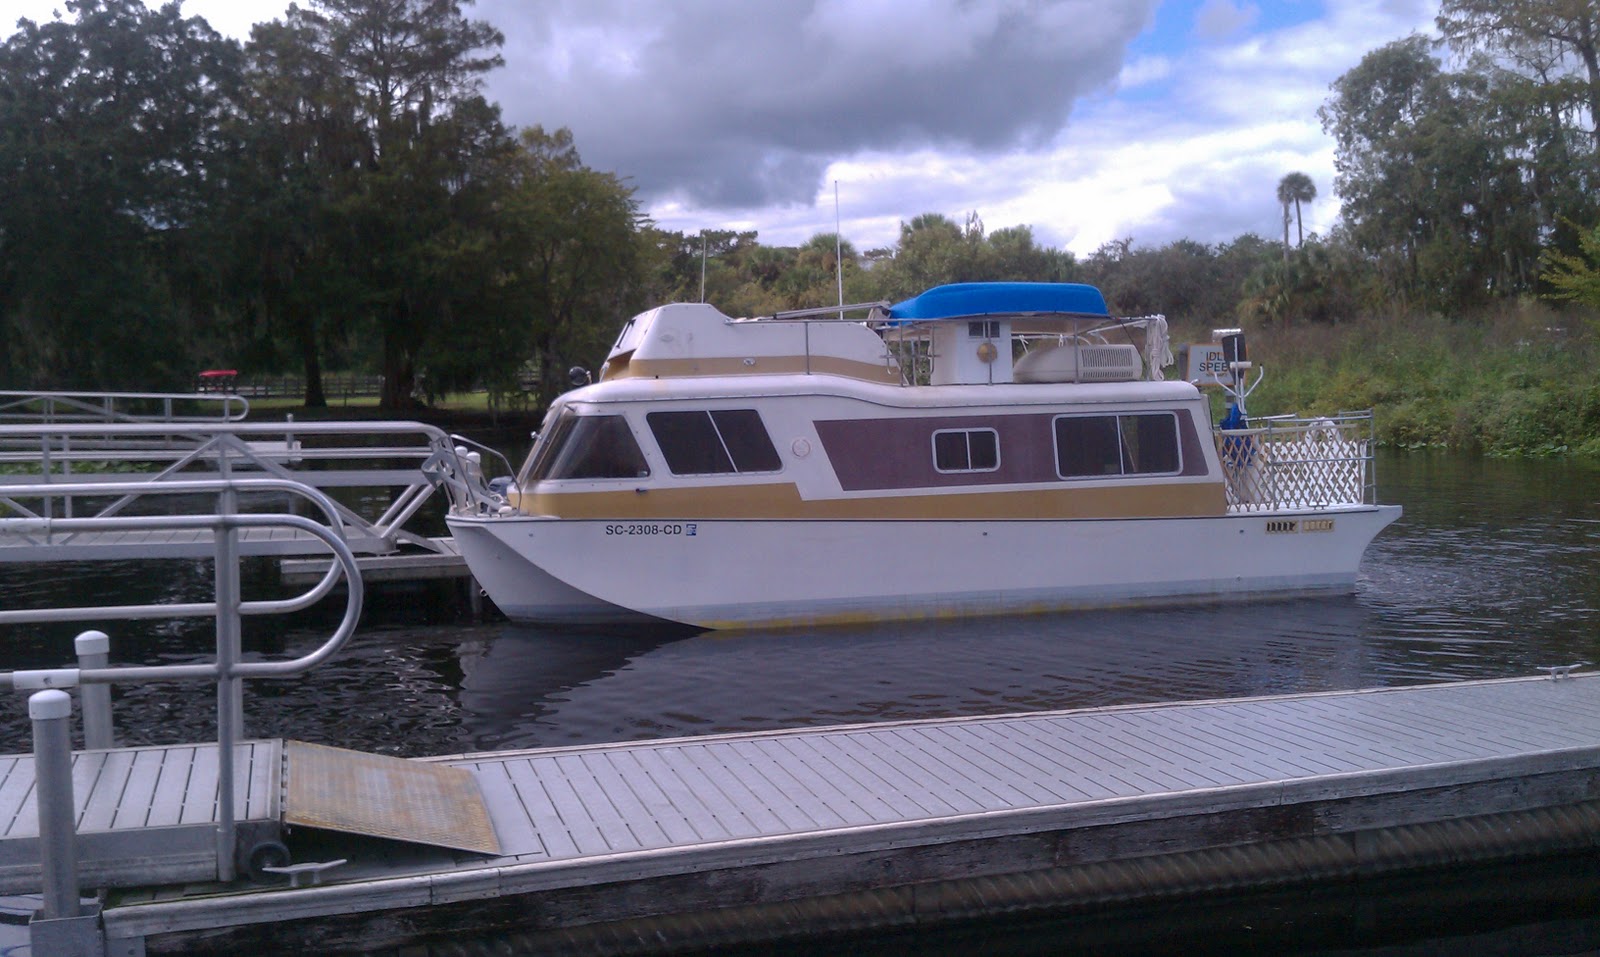
I ordered a new bimini for the flybridge 6'L X 4'H X 75"W ($130). The old one (6L X 4H X 5'W) needed a boot and a lot of sewing to get it back in shape. The new one will mount to the rails instead of the sides of the flybridge, giving us a little more rain protection and a better stowage fit when not in use. Pic is of the old one.

Still working on new flybridge upholstery. I bought a commercial back-to-back/lounge setup shortly after acquiring Big Duck and finally got around to slicing the base for a fit on the flybridge, but I think I can do better with a one off custom job incorporating the old bimini hardware.

And before the 2,100 mile trip from SC to Lake Powell this fall, a TPMS will be in/on order for the trailer.

Tuesday, February 21, 2012

Generator Covers

I'm not a fan of 'protecting' my generators from sun and rain, and so far have no reason to regret it.

On the little boat we used a Honda EU1000i for air conditioning (6,000 BTU window unit), cooking (George Forman cooker), heat (750 watt electric heater), small microwave, coffee maker and occasional power tool or hairdryer, albeit one at a time. I mounted the generator on the back of the boat and ran it at anchor, underway and in the parking lot while Wallydocking (sleeping aboard on land) day or night, sun or rain (and even snow). The only time I worried about contaminating it was underway, especially in salt water, so it got a sunbrella bib.


The 1000i's bigger brother, a 2000i was mounted on the back hitch of the van to power an R2D2 unit for stealth camping on the road.

I made a cover for the 2000i so the generator was out of sight when not in use. We often ran the generator while driving, even in the rain, without the cover. The van's air conditioner was not up to par at idle speeds while in traffic jams.

Our biggest "i" series, the 3000i was originally mounted on the tongue of the camping trailer. It too got a plain cover to keep it out of sight. The cover was 3/8" ply with aluminum angle corners. I got tired of lifting the box to put gas in it, so I put a hatch on top for easy filling.

Then I put a grill in the front of the box to get to see the indicator lights.


Then I decided to try fitting out the box to be able to stay in place while the generator was running. I put a grill in for the exhaust, and glued a foam band to the inside of the box so when the box was in place, the foam separated the front (intake) and exhaust sides of the generator. I also put a sheet metal cowl in the box above the exhaust. You can see the foam (a little left of center coming down from the arch) as well as the metal cowl (arch) in this pic.

So now she is ready...

well, except for a port to yank the cord when the battery is dead.
The brass thing under the exhaust grill is an old windup heat detector. They were in every room of the hose when we bought it. You wind it up and when the temp gets to a certain point, the bell clangs to wake the dead. It's never gone off.


With the success of the 3000i, I want back to try to use the cover on the 2000i while it was running. I fully opened up the back of the box and put ports in the box where the generator had vents. I didn't plan to start the generator with the cover on, I'd remove the cover, get the generator going and then replace the cover.

The openings are all covered over now because the 2000i had trouble getting the air conditioner compressor running again after it had cycled a couple times. Even without the cover, the generator occasionally had trouble with the R2D2 unit in the van.  R2D2 is the roll around portable air conditioner opposite the wheelchair in the back of the van.

 I decided that it was too much trouble taking the box off for the restart, and if I opened the box up any more for better cooling/circulation it wouldn't serve it's purpose of hiding the generator while we were away from the van.

But, in all fairness, once we went to the window unit in the van the 2000i never gave us a bit of trouble, and I haven't since tried running the generator with the cover on.

Friday, February 17, 2012

Empty Bilge

The second tank came loose easier than expected. I slid it forward to clear the engine room bulkhead and my daughter helped me rotate it up out of the bilge. The tanks are identical except for the placement of the fittings (and the color).


There were a couple perforations in the aft tank as well as some of those shiny spots.


 Digging out the foam was a little more satisfying with all the room. I was even able to get out some big pieces.
I discovered that what I thought to be mat under the tanks was actually compressed foam harboring water and gasoline.

 It amazes me that there is/can be an 15' length of hull without any cross bracing.
I'm doing the math now to see if I can go back in with a single tank about 10' long as opposed to 2 five footers. This will also allow me to use a rectangular tank because there will be no need for a fill hose going forward to the other tank.

I'm still undecided about whether to go with aluminum or plastic. The plastic tank is immune to corrosion but costs several hundred dollars more. However, now I can install an aluminum tank off the bottom of the bilge so it stays dry.

Thursday, February 16, 2012

My Boat For The Bahamas

I've occasionally been asked what/which boat I'd recommend for a Bahamas cruise. My ideal Bahamas adventure would be at least 2 months long without ever having to go ashore for supplies. We pretty much did that in the 70's when were were young, tough and adventurous, in a 27' sailboat without a generator or refrigeration.


The single cylinder 10 HP diesel ran forever on the 20 gallon diesel tank. We carried only 20 gallons of fresh water, but had a rain catcher which would fill our water tank with the slightest hint of rain. We used Joy to lather up and rinse in salt water - we could then pat dry or use a quart or so of fresh water from a garden sprayer to finish up. Wife Suzy, could take a complete shower with the garden sprayer using only a gallon. We didn't wear enough clothes to worry about laundry. With a little ingenuity and some skill you can get at least 50% of your nourishment from the sea/beach...fish, shrimp, crab, conch, coconuts. Even so, we filled every nook and cranny of storage with food - we liked the cans/bottles of vegies that were packed in water which we drank or used for soup. Between the cans, we stuffed small jars of (ready to eat) baby food. We grew sprouts. We made bread in the pressure cooker. You also need room for sails, tools and ground tackle - we carried 5 anchors, one with all chain rode. The 27 X 8 X 4 sailboat was heaven for us then, except for the ugly hot breezeless, humid summer nights when I wore socks on my hands to keep the no-seeums from devouring me, and a pillow case over my head in the  90°+ nights.

We realize now, that if we hadn't insisted on a boat that could cross oceans and be handled by either of us alone, we wouldn't have needed such a small stout sailboat. We met a very young cruising couple on a 19' sailboat (without standing headroom), who, because they ran the motor 80% of the time, said they would have been far better off with a power boat. After our three years cruising summers/working winters, while living aboard, we too calculated that over 80% of our miles were under power.

So after the sailboat, we bought a 35' trawler with all the comforts of home.

One might have thought that this would be just the ticket, but it wasn't for us. She was expensive, but earned her keep by being in charter service, but she was locked into a slip with the same starting point for every cruise, not to mention the nearest port is over 200 miles from the house. We needed a boat we could trailer.

A trailerable powerboat of some kind would work if one eliminates the 'oceans' part as a requirement. And even a small powerboat doesn't necessarily exclude the Bahamas for a savvy skipper with a prudent weather sense. With our 18' cuddy cabin outboard we covered over 50,000 road miles which included launching at well over 100 different ramps from New England to Key West to San Diego to Alaska, as well as a crossing to the Bahamas. At trawler speeds, we could spend a week aboard without touching a dock.


So, are you willing to cruise without headroom, or headroom without refrigeration or can you bear the expense of about $1,000/mo for payments and maintenance for a trawler with all the comforts?  The sailboat unquestionably offered the most freedom, but at the cost of comfort and speed. The 18' cuddy was the most versatile but needing regular fuel and stores - a very limiting factor in the Bahamas, and the trawler was a total commitment for the sake of comfort. It all depends on your priorities.

Today we are back to needing comforts, but still require trailerability and our choice is a 40 year old, 28' trailerable houseboat we call Big Duck. She easily swallows up our daughter, son-in-law, grandson and their dog in addition to my wife Suzy, myself and our faithful four legged companion, Merlin.


Where you are in life determines the boat best suited to your needs.

Monday, February 6, 2012

Tankectomy

Well Holiday, there were two elephants in the room, but now there's only one.


This fellow is aluminum, about 65" long.

And as mentioned before about the area between the tanks not having any place to drain...

that's where the major perforation was on this tank.

This tank sat on what appears to be a tightly woven mat about 1/8" thick. There is a large shiny area on the bottom of the tank where it came in contact with the mat in the presence of liquid. It seems there was something electro chemical going on there. I'll need to do some research before deciding on how to mount the new tanks.


So at the end of the day, the Land N Sea designers were kind to me. I like this boat more and more.

Now on to the second tank.

Sunday, February 5, 2012

Disecting Big Duck - A Tankless Endeavor

Big Duck has two belly tanks. As far as I can tell they're the same shape/size, about 50 gallons each and I know the aft tank leaks and maybe so does the forward tank. They can be accessed via a hatch that runs the length of the cabin sole.


The red one is forward. They are both foamed in, witnessed by the bulges of foam on the right side of the picture. The tanks have been closed up, the fills have been capped off as are the feeds and vents. The effort now is to free the tanks from the foam and see if they can be rotated up out of the opening.

The first step was to make some work platforms.

I thought the easiest way to get the foam out would be with an electric knife...just cut out big pieces. This didn't work well. What did work was the back end of the claw hammer.
Hack out small chunks, then follow up with a 1/8" X 1" X 24" steel bar - slightly sharpened to scrape the remainder off the sides and bottom. A keyhole saw also proved useful for some places.

There was an interesting situation between the tanks. The area was filled/sealed with foam ensuring that any water (or gasoline) that worked it's way into the area had no means of escape. There is an area below the tanks that allows drainage all the way from the forward part of the boat, but it was completely sealed off with foam. So digging out the foam/sludge there got to be a messy job.


So now the forward tank is de-foamed.


The next step is to see if the tank can be freed from the hull, and if it can, will it be able to be extracted from the opening?

Before calling it a day, I wanted to see if the tank could be easily lifted away from the hull. I wedged a tack puller under the corner of the tank to see if I could encourage it to come up - maybe just a little?


More on that in the next installment...